Manage conversions
The conversion editor can be started via the per menu  . This allows you to manage, create and delete conversion elements.
A menu entry is created for each conversion. This entry can be used to convert the selected data record into the desired format.

| Settings | |

|
Display name of the conversion in the menu. |

|
Display colours of the conversion in the menu. |
| Image | |

|
Mode: Use captured raw images: The conversion is performed with the original images. Generate image from display record: The conversion is carried out via a display record (drop-down selection above the image). |

|
Selection of the record for the "Generate image from display record" mode. |

|
File type of the saved image. Pay attention to the image depth of the raw image here. |

|
Image quality with file type JPG. |
| File | |

|
Target folder for the generated file. A dynamic name can be configured using the editor. |

|
Name of the generated file. A dynamic name can be configured using the editor. |
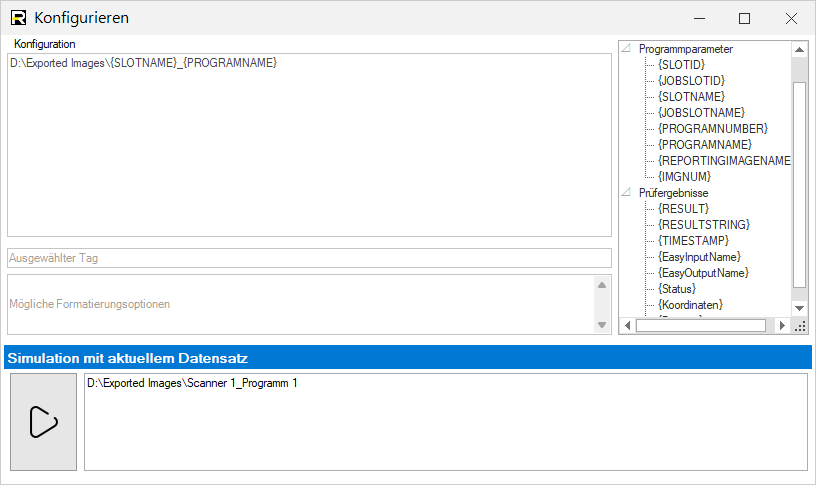
Configure path and file name
The target folder and file name can be generated from the loaded test results using a dynamic tag. This enables very simple and flexible parameterisation.